 Amazon S3 Connector for Jira
Description
The Amazon S3 Connector for Jira is a powerful app that turns your Jira instance into an unlimited file storage system. Combining a simple and intuitive UI with the power of AWS S3 Buckets allows you to share content across multiple teams, securely and at scale.
To get started create an S3 Bucket, get an IAM access key, and add these details to the connector.
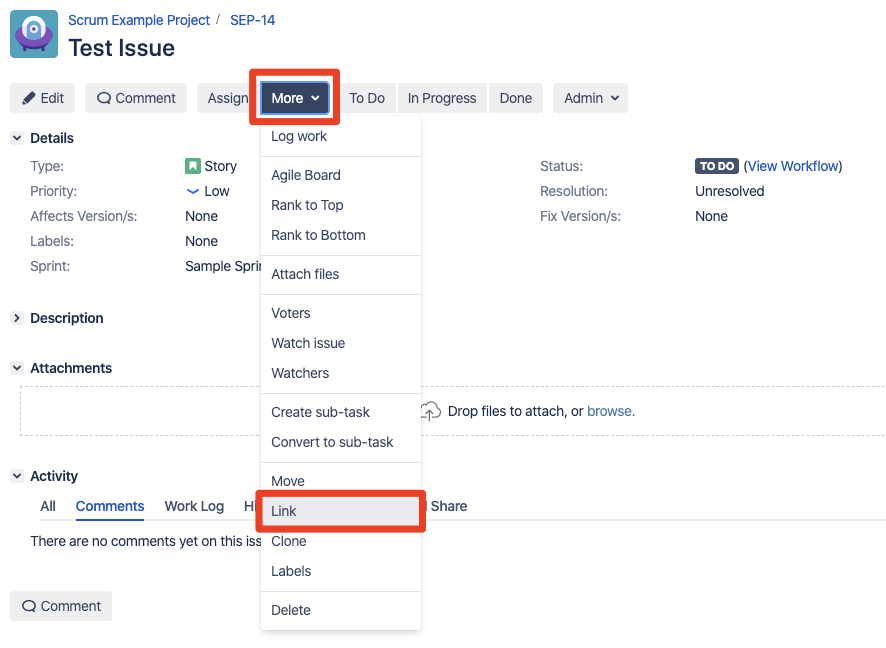
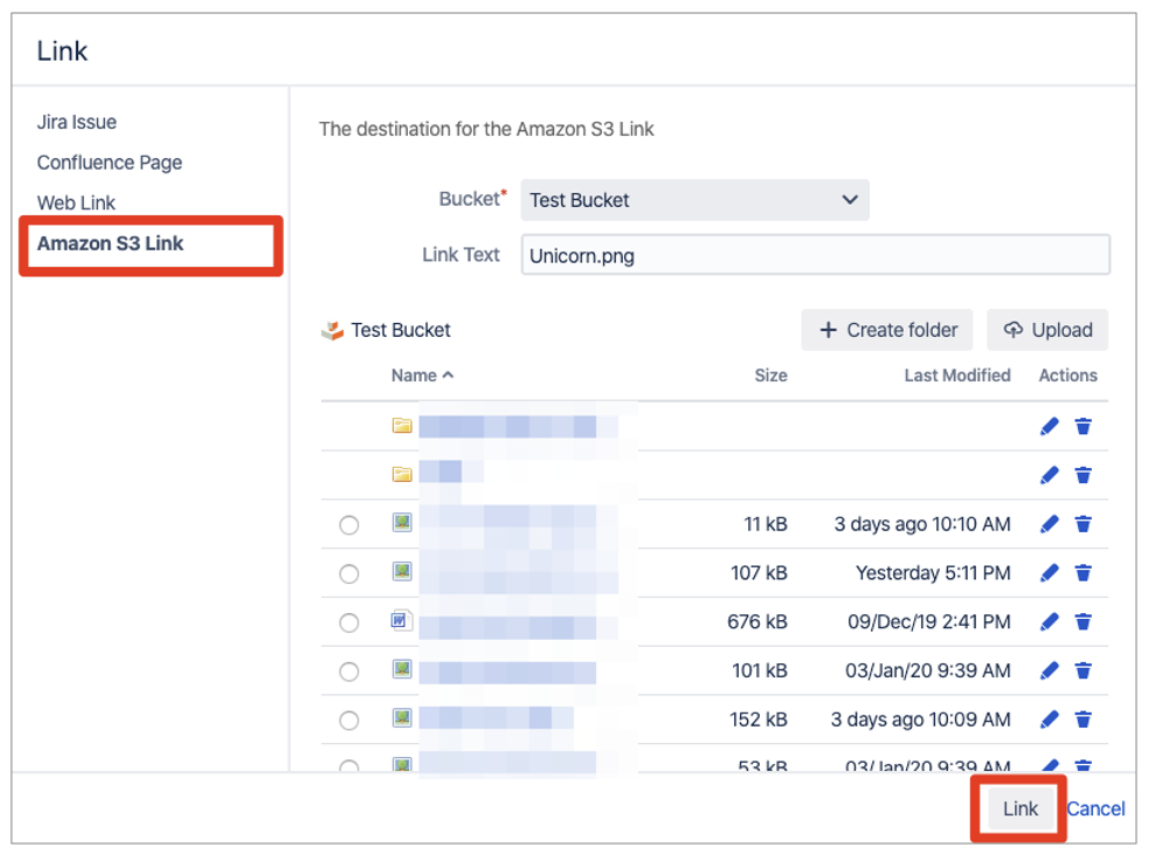
Use the standard issue "Link" feature under the "More ▾" dropdown and select "Amazon S3 Link"
Features:
- Upload and link files directly from a Jira issue
- Quickly add multiple buckets
- Restrict access to specific users, groups and Projects for each Bucket
- Create new folders to easily manage multiple files and projects
- Rename files and folders with a single button
If you're looking to connect your Confluence instance with an AWS S3 Bucket try our Amazon S3 Connector for Confluence app!
Get Started
Available platforms
| Jira Platform | Availability | Compatible Version |
|---|---|---|
| Cloud | Coming soon! | |
| Server | Unable to render {include} The included page could not be found. - Unable to render {include} The included page could not be found. | |
| Data Center |
Unable to render {include} The included page could not be found. - Unable to render {include} The included page could not be found.
|
Pricing
Get Amazon S3 Connector for Jira
Start your 30-day free trial of Amazon S3 Connector for Jira from the Atlassian Marketplace or directly on your Confluence instance by going to "Find new apps". Only Administrators can install apps on Confluence.
User's Guide
Amazon S3 Connector for Jira user guide:
Adding a new Bucket
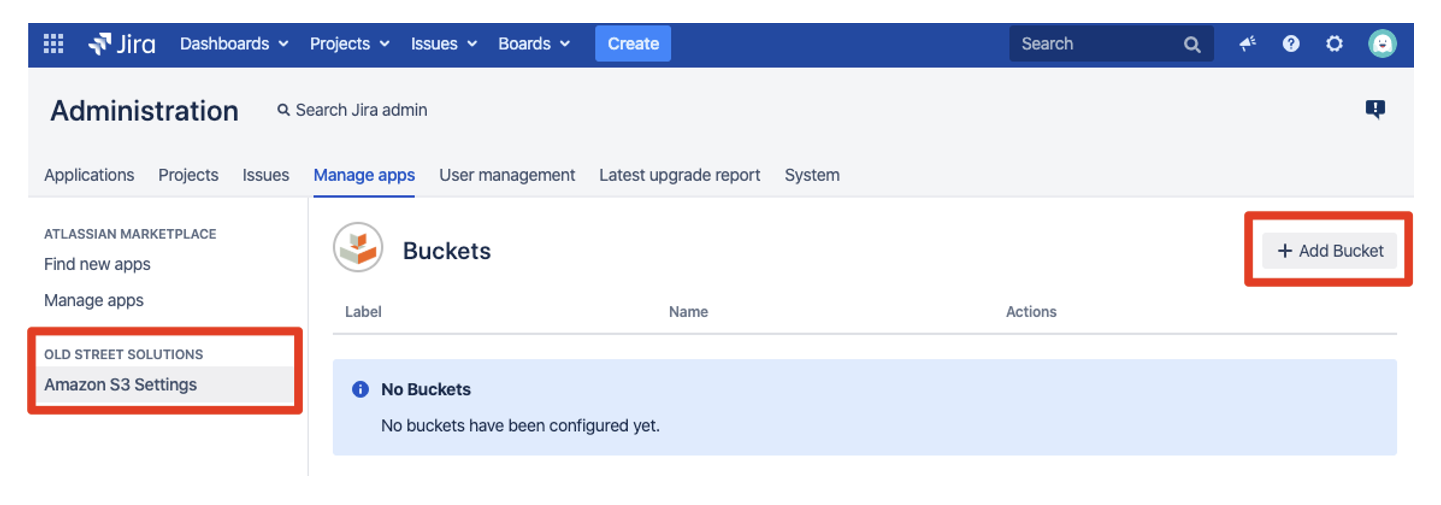
The administration section gives you the ability to manage your Amazon S3 Buckets.
To create a new Bucket association, click on "+ Add Bucket"
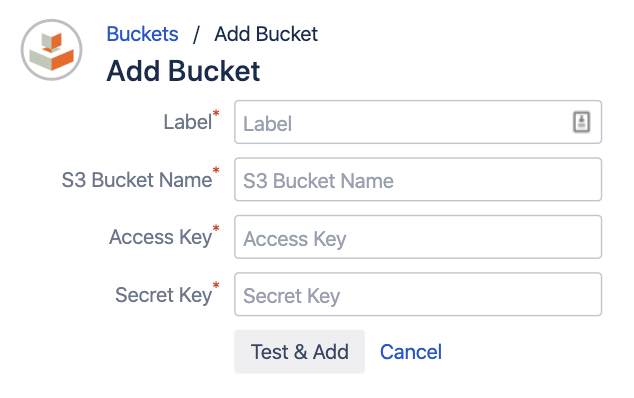
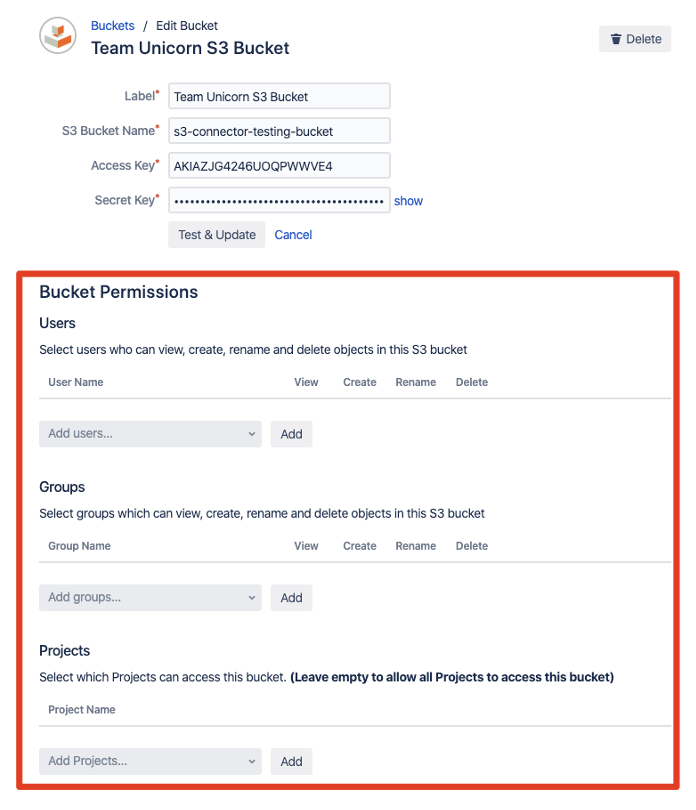
Fill in all required fields to successfully add a new bucket
| Label | A custom label that will be used in the macro to hide the real S3 Bucket name |
|---|---|
| S3 Bucket Name | The name of your S3 Bucket exactly as it is displayed in AWS (Buckets can be created using the AWS Console) |
| Access Key | The access key of the IAM user who has access to specified S3 Bucket (Created through IAM on the AWS Console) |
| Secret Key | The secret key of the IAM user who has access to specified S3 Bucket (Created through IAM on the AWS Console) |
Note: To start a bucket in a subdirectory simply add the path to the bucket name E.g. BucketName/SubDirectory |
|---|
To test your Bucket credentials click on the button “Test & Add” and you will be informed of any errors
Bucket Permissions
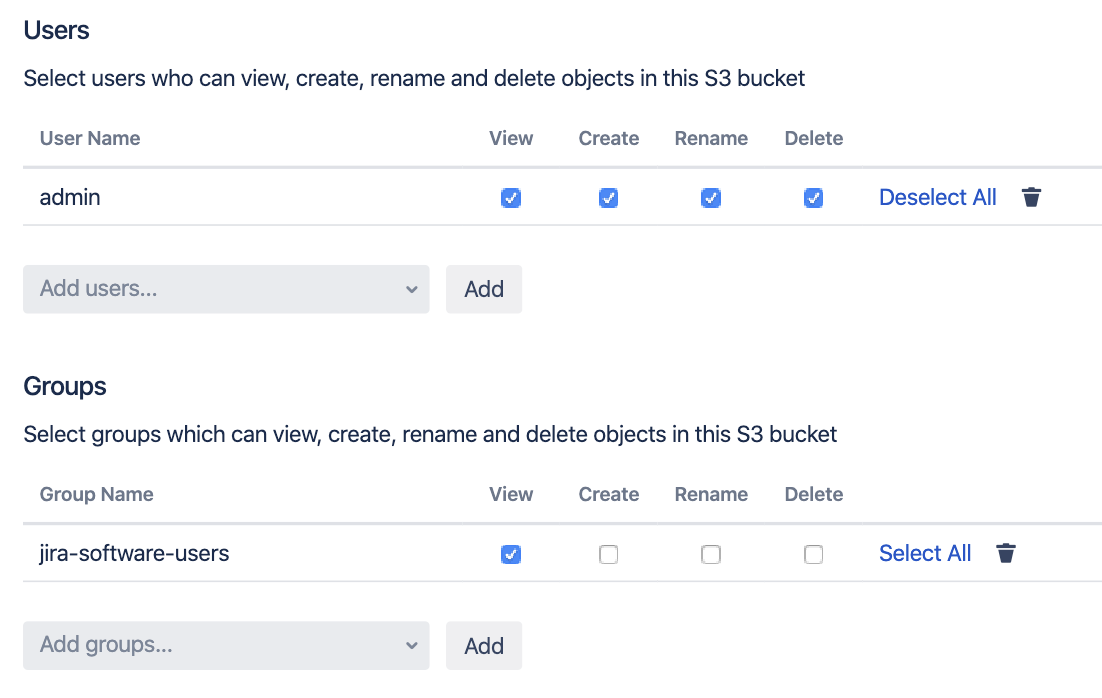
Once a bucket has been created the permission manager will appear where you can select which users, groups and Projects can access the Bucket
If you do not set any permissions after creating a bucket, no one will be able to view, edit or delete objects |
Add users and groups to the Bucket permissions to grant them the desired level of access
| View | View all bucket files |
|---|---|
| Create | Upload files and create new folders |
| Rename | Rename existing files and folders |
| Delete | Delete files and folders |
Restrict Bucket access to only allow it to be viewed in selected Projects - Leave empty to allow all Projects to access this bucket
Editing and Deleting a Bucket
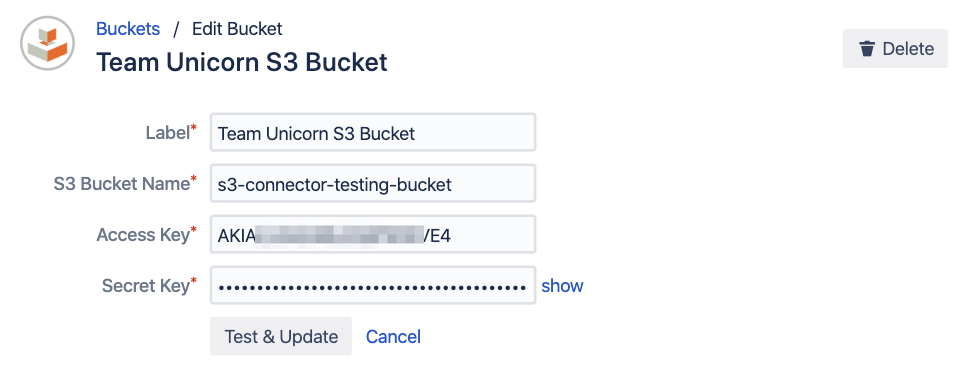
Existing Buckets can be edited and deleted from the main Bucket list on the Amazon S3 Settings menu
Linking Issues
Use the standard issue "Link" feature under the "More ▾" dropdown and select "Amazon S3 Link"
Select a file to link, add link text (optional) and click "link"
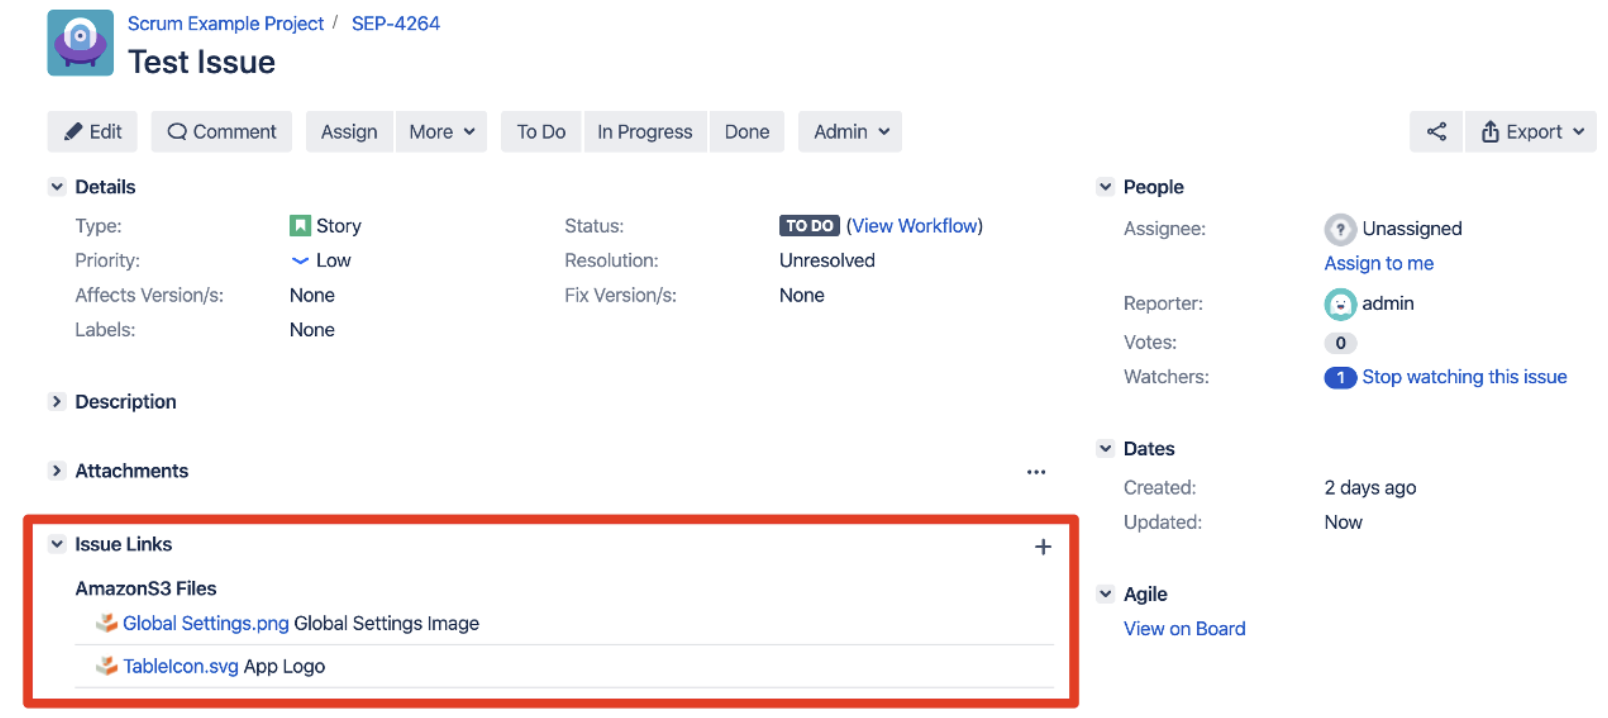
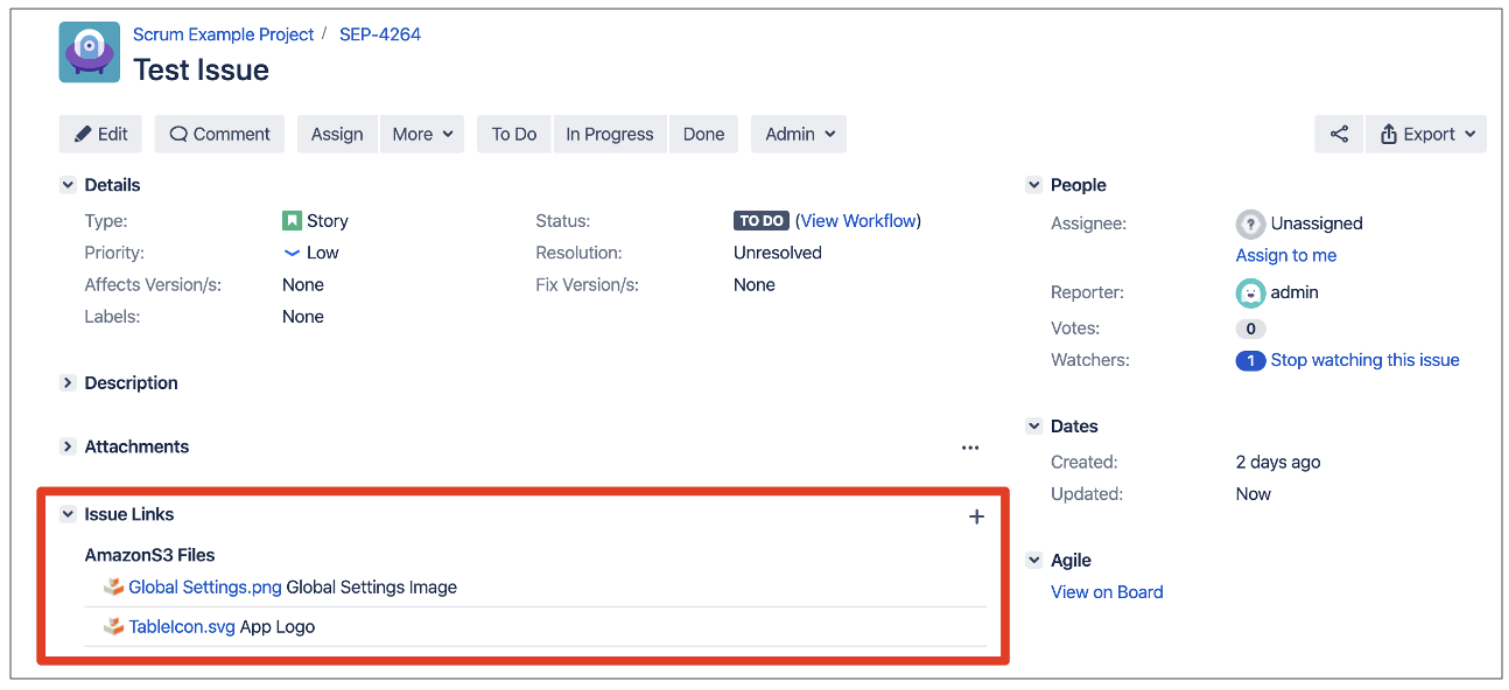
Amazon S3 Links are displayed under the "Issue Links" pannel


