E-mails send via External Share can be customized to allow you to pass your own subject and content. Follow this guide to find out how to do it.
Go to External Share’s Global Settings

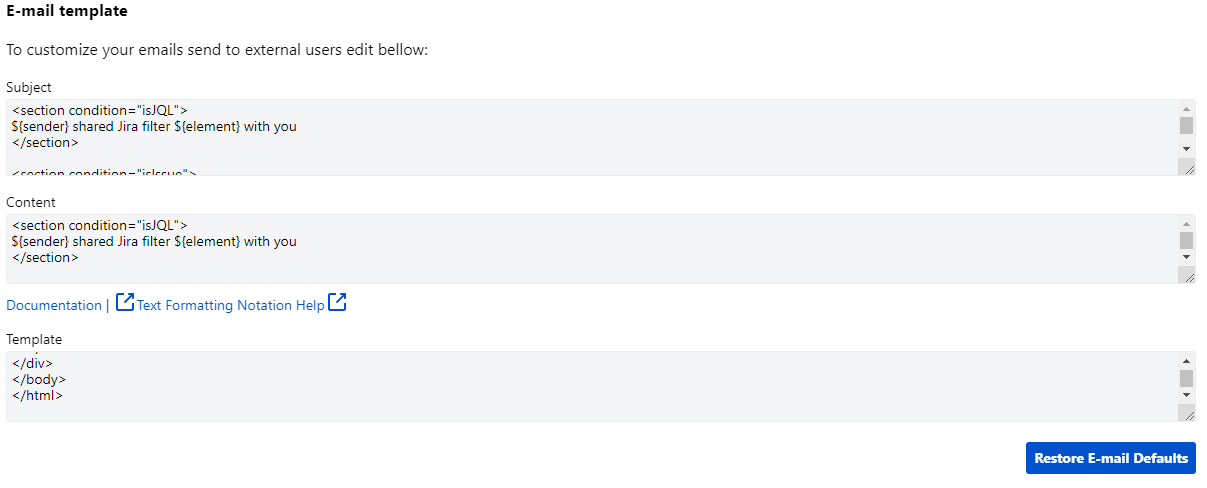
Scroll down to the E-mail template section. You will notice that all settings here are filled with default values.
Edit the settings following these guidelines:
Title and content contain keywords which are replaced with the following values when the e-mail form is displayed in context of selected share:
${sender} - user sending the message,
${element} - type of the conent shared, can be a filter, issue or board,
${password} - optional password used to protect shared link,
${url} - unique shared link url address,
${expiration} - optional expiration date of shared link.
Title and content contain conditional sections which allow you to modify the email message.
<section condition=”some-condition”>some text</section>
A section contains a start tag
<section condition="some-condition">with required condition attribute, text value and end tag</section>.NOTE: All sections must be correctly opened, closed and must containt condition attribute.
When the email form is displayed in context of the selected share, all sections with unmet conditions will be removed.
For sections with conditions met, their text value content is added to the message body. Below you can find all section conditions you can use:
is-jql- defines if shared link is a Jira filter,
is-issue - defines if shared link is an issue,
is-board - defines if shared link is a board.
has-password - shared link is secured with password,
has-expiration - expiration date is set on share,
allow-add-comments-and-attachments - both ‘View comments' and 'View attachments’ options checked,
allow-add-attachments - only 'View attachments’ option checked,
allow-add-comments - only 'View comments’ option checked.
You can use markdown notation to modify the content of the e-mail. Further explanation can be found here.
The template section allows you to pass html template. It’s necessary to put
<section id="content"></section>here, as this section will be replaced with the content of your e-mail. The template must contain a valid html and allows any CSS property added as inline. To use inline styles, add the style attribute to the relevant element. NOTE: The template is not visible in the e-mail editor, it will be applied when the e-mail is sent.
Click the Save button at the bottom of the page to save your changes. In case you want to revert back to defaults, click the Restore e-mail Defaults button. This will load the default settings for e-mail template, however, you need to save changes to restore the defaults permanently. In case you want to return to the last saved version, simply refresh the page.